WE AMPLIFY MOBILE SIGNALS
SINCE 2001
SINCE 2001
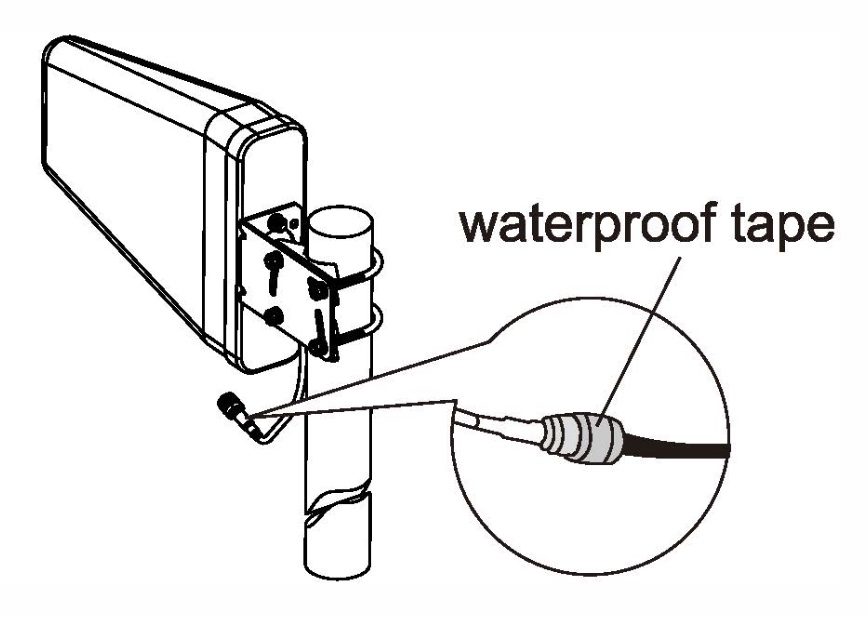
Proper antenna connection is crucial for the optimal performance of your signal booster. Incorrect installation can lead to poor signal reception, auto-oscillation, or reduced coverage. Follow this guide to correctly connect and mount the external and internal antennas in your system.
A typical signal booster kit consists of the following components:
External Antenna – can be:
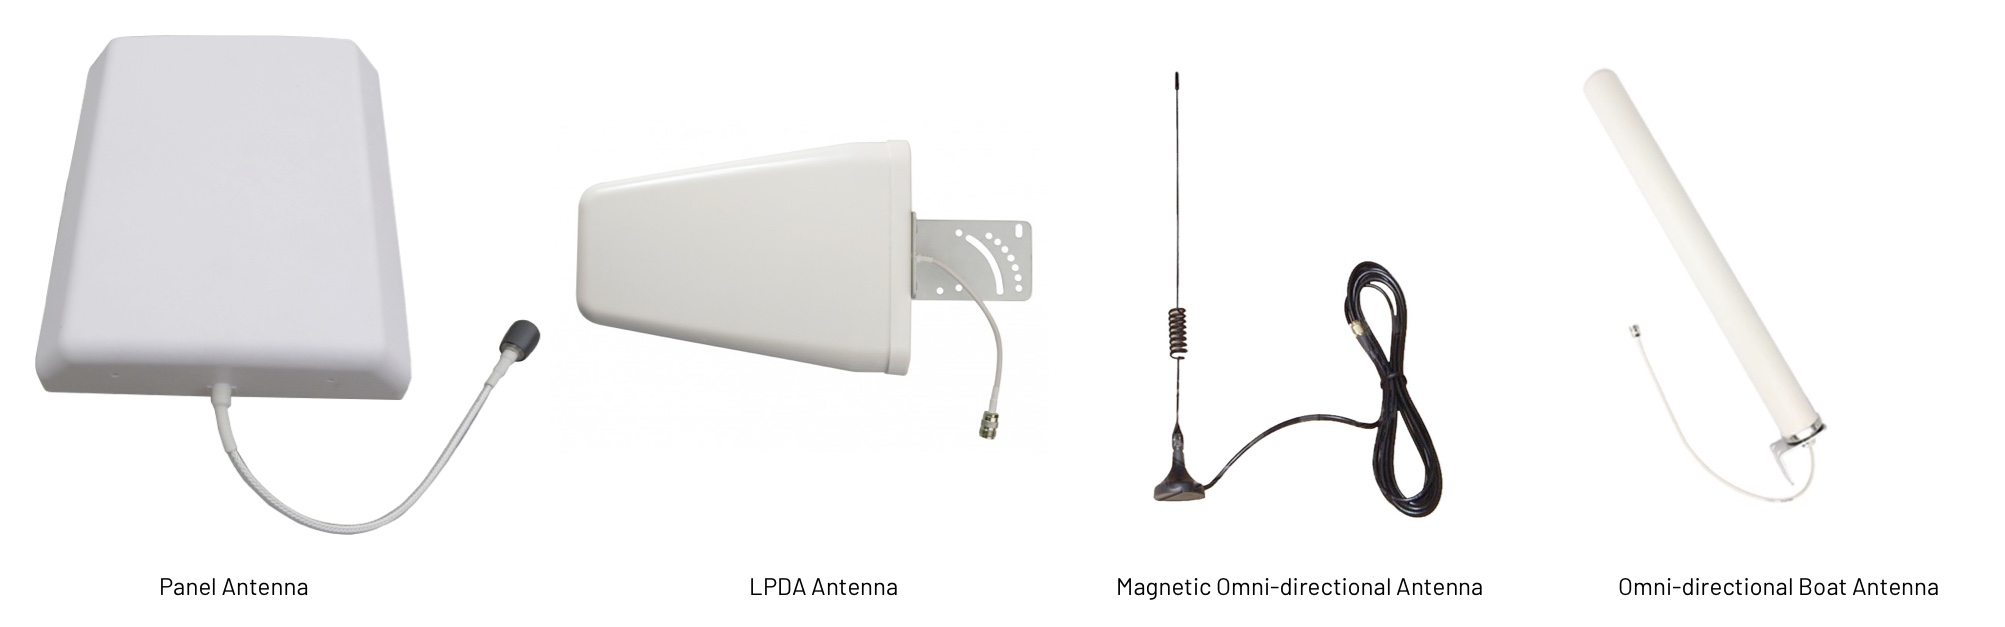
External Antennas
External Cable – connects the external antenna to the booster.
Standard lengths range from 10 to 20 meters, but can be adjusted as needed.
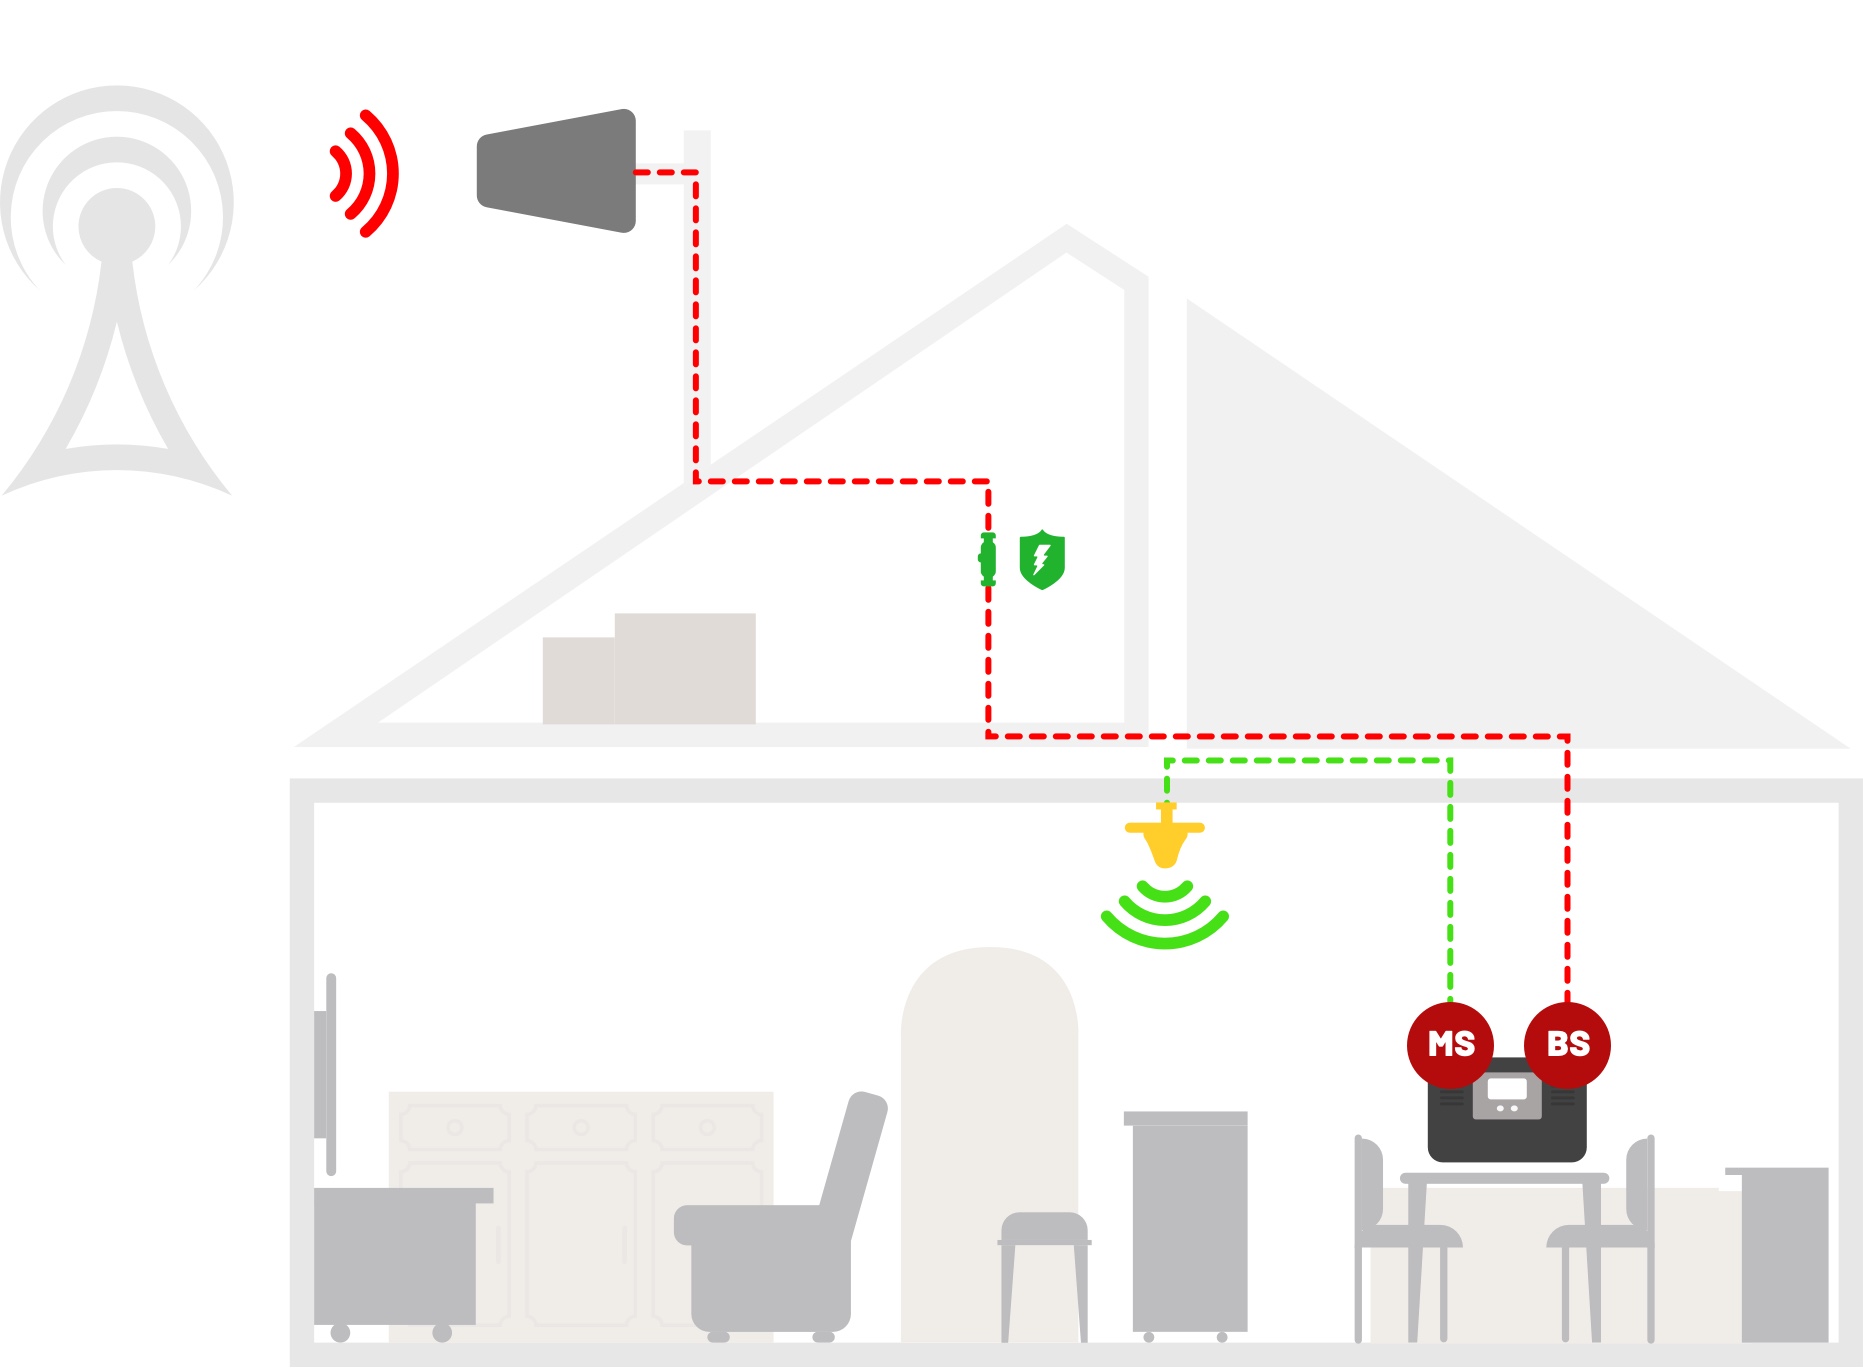
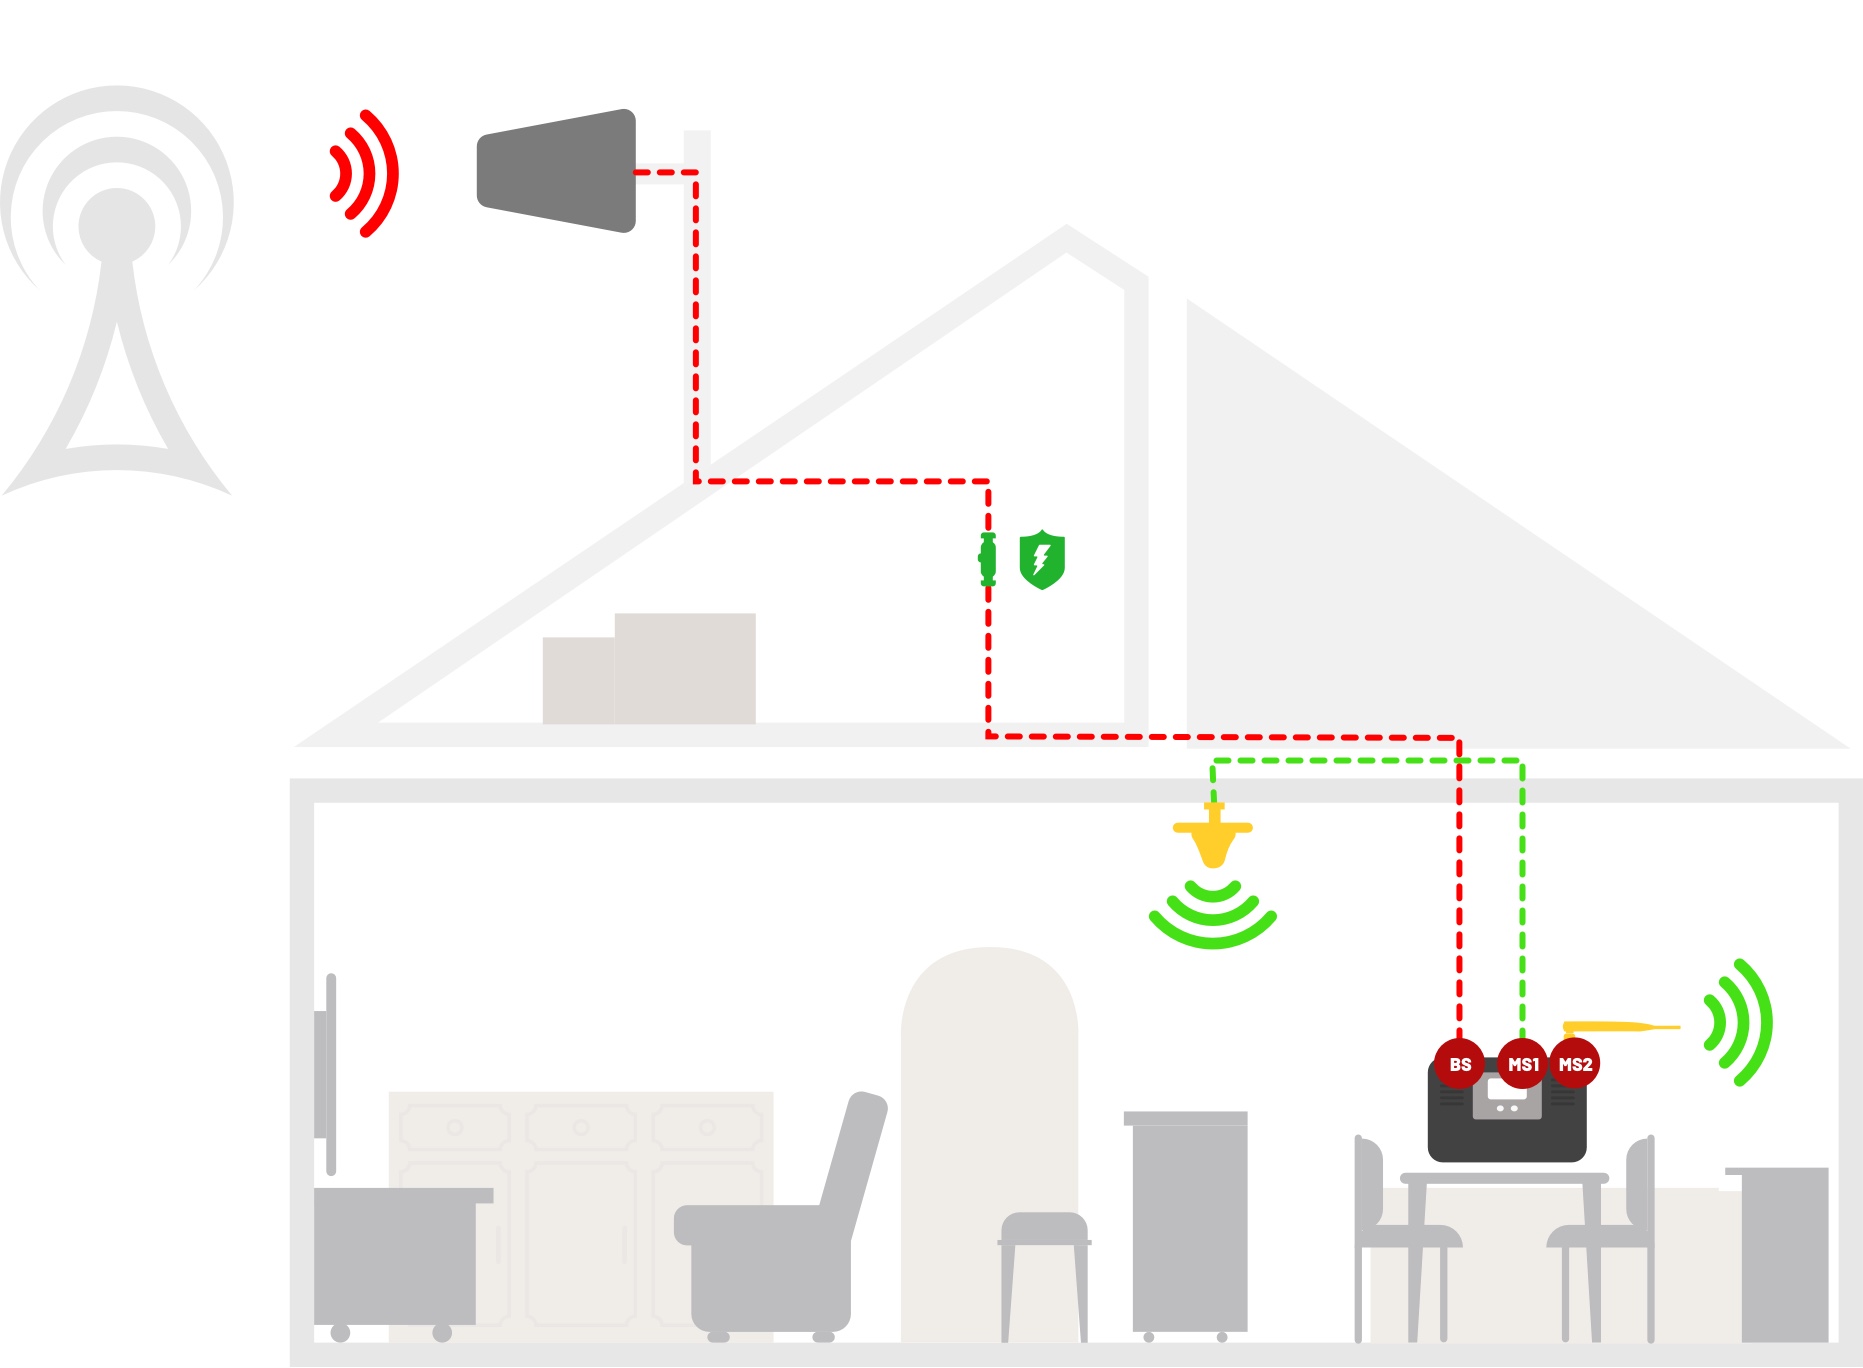
Signal Booster Unit – The core device that amplifies the signal.
Internal Cable – Connects the internal antenna to the booster. Standard length is 5 meters, but can be shortened or extended if needed. Some basic models for small coverage may not require an internal cable.
Internal Antenna – can be:
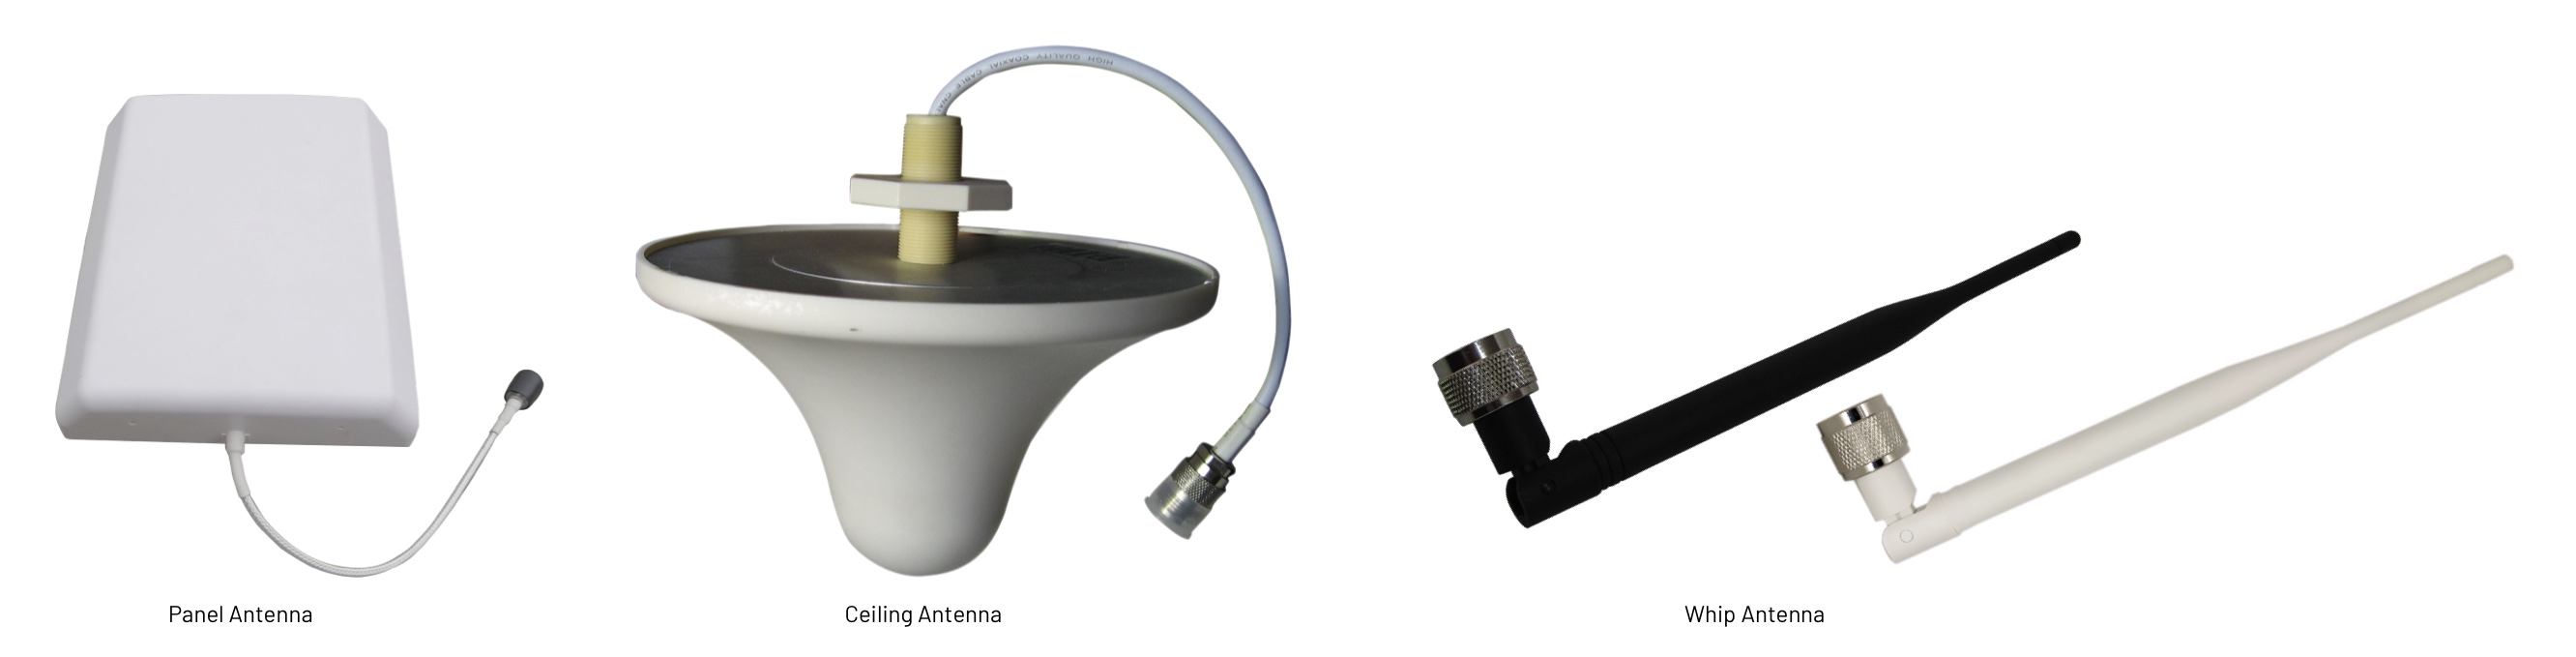
Internal Antennas
Different booster models have different port labels. Here’s what they mean:
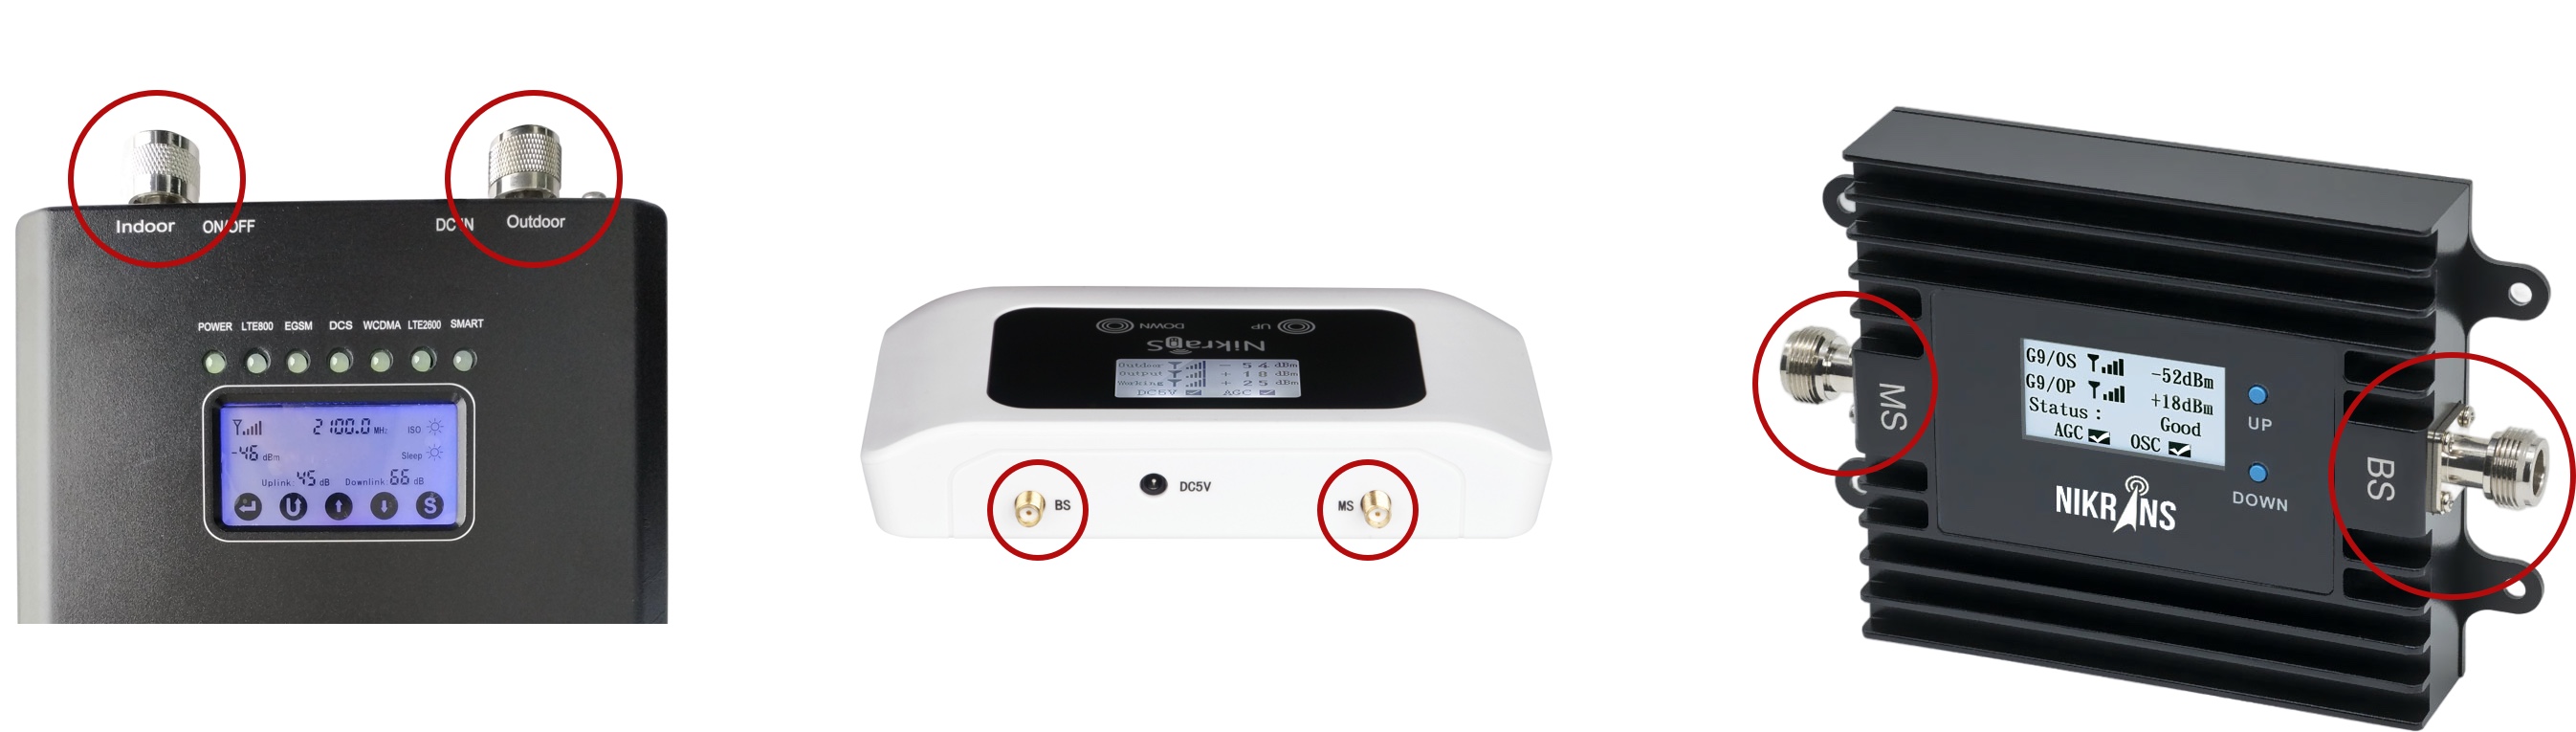
Some models have two indoor ports, allowing use of 2 indoor antennas simultaneously. In this case:
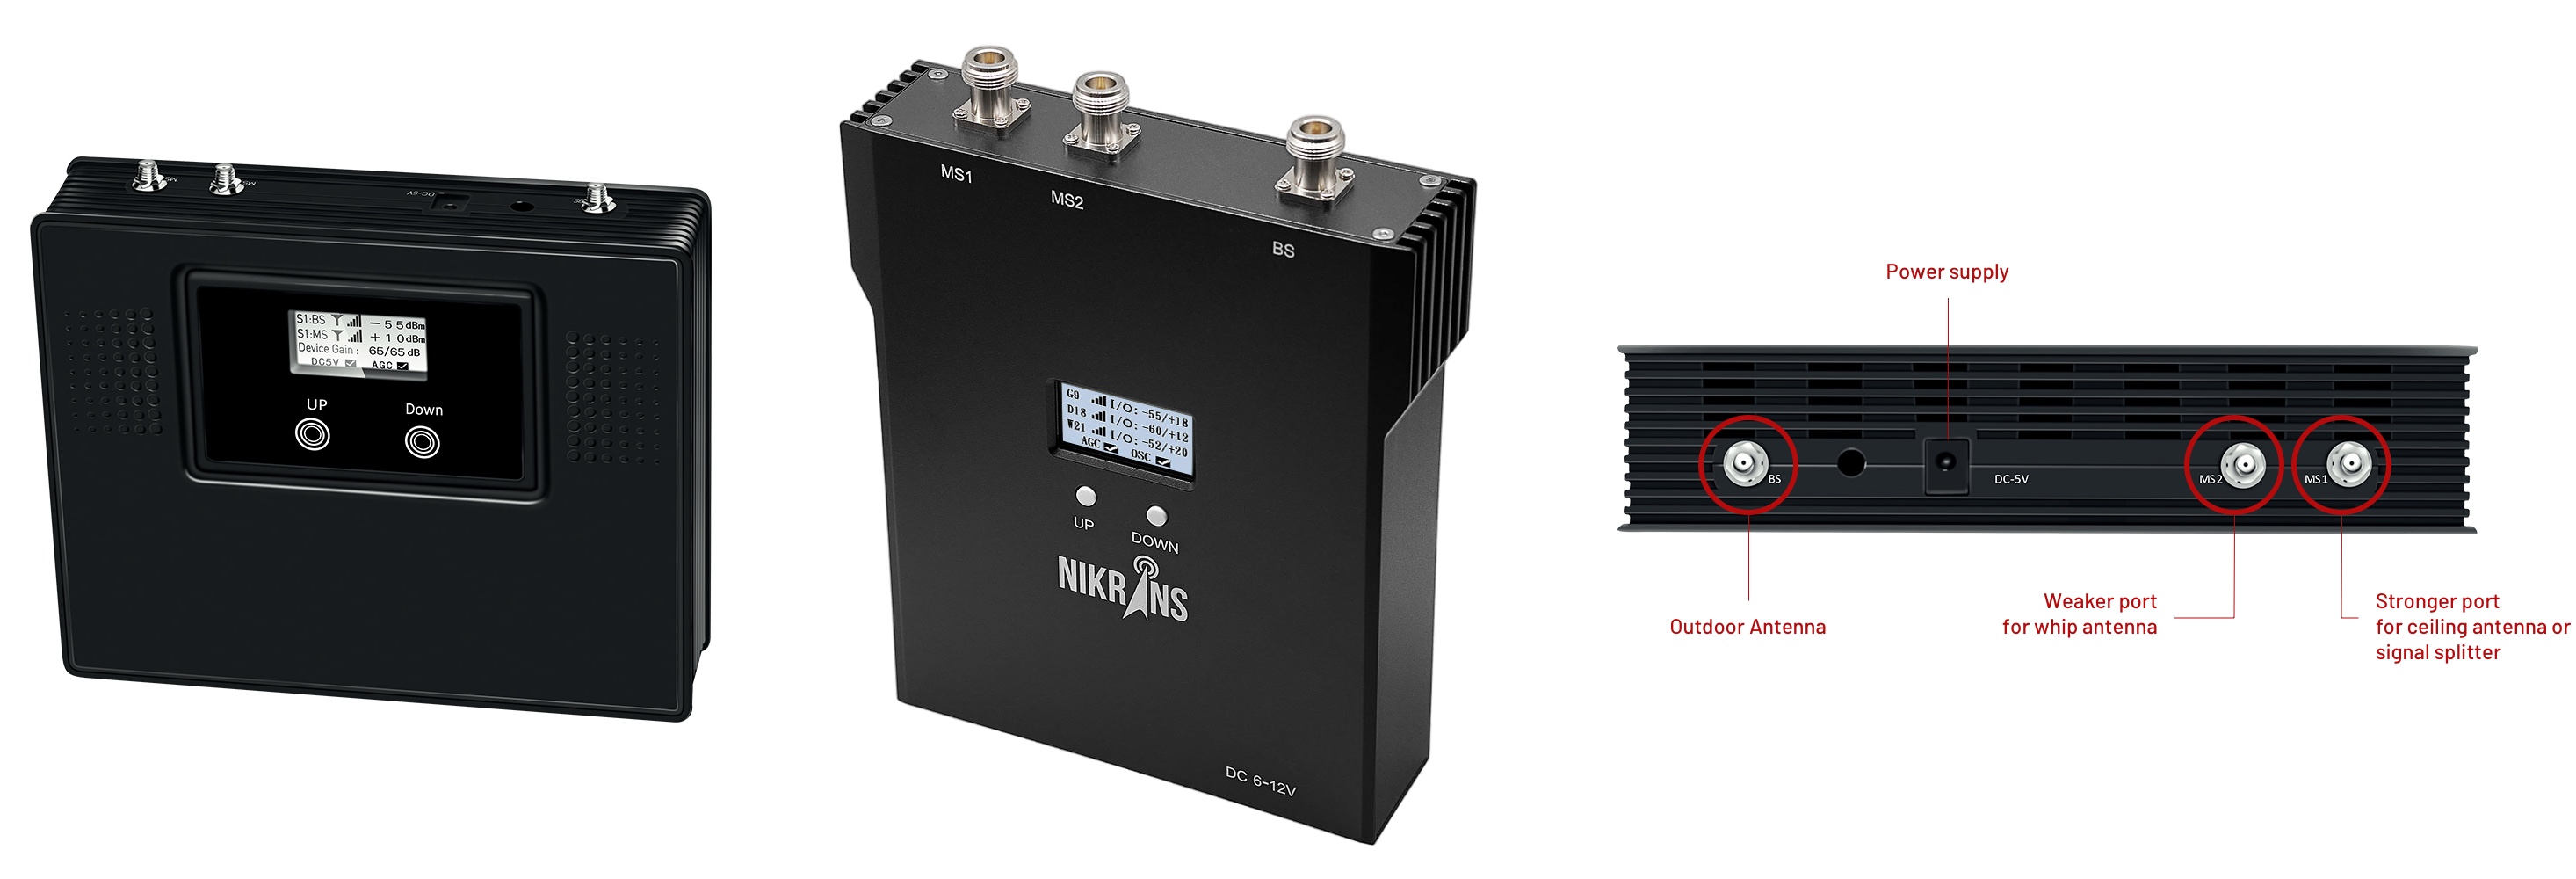
*Note: If your coverage area is small and the distance between 2 indoor antennas is less than 5 meters, use only one indoor antenna to avoid signal interference.
Booster kit with one indoor antenna:
Booster kit with two indoor antennas:
Installation in a van or car
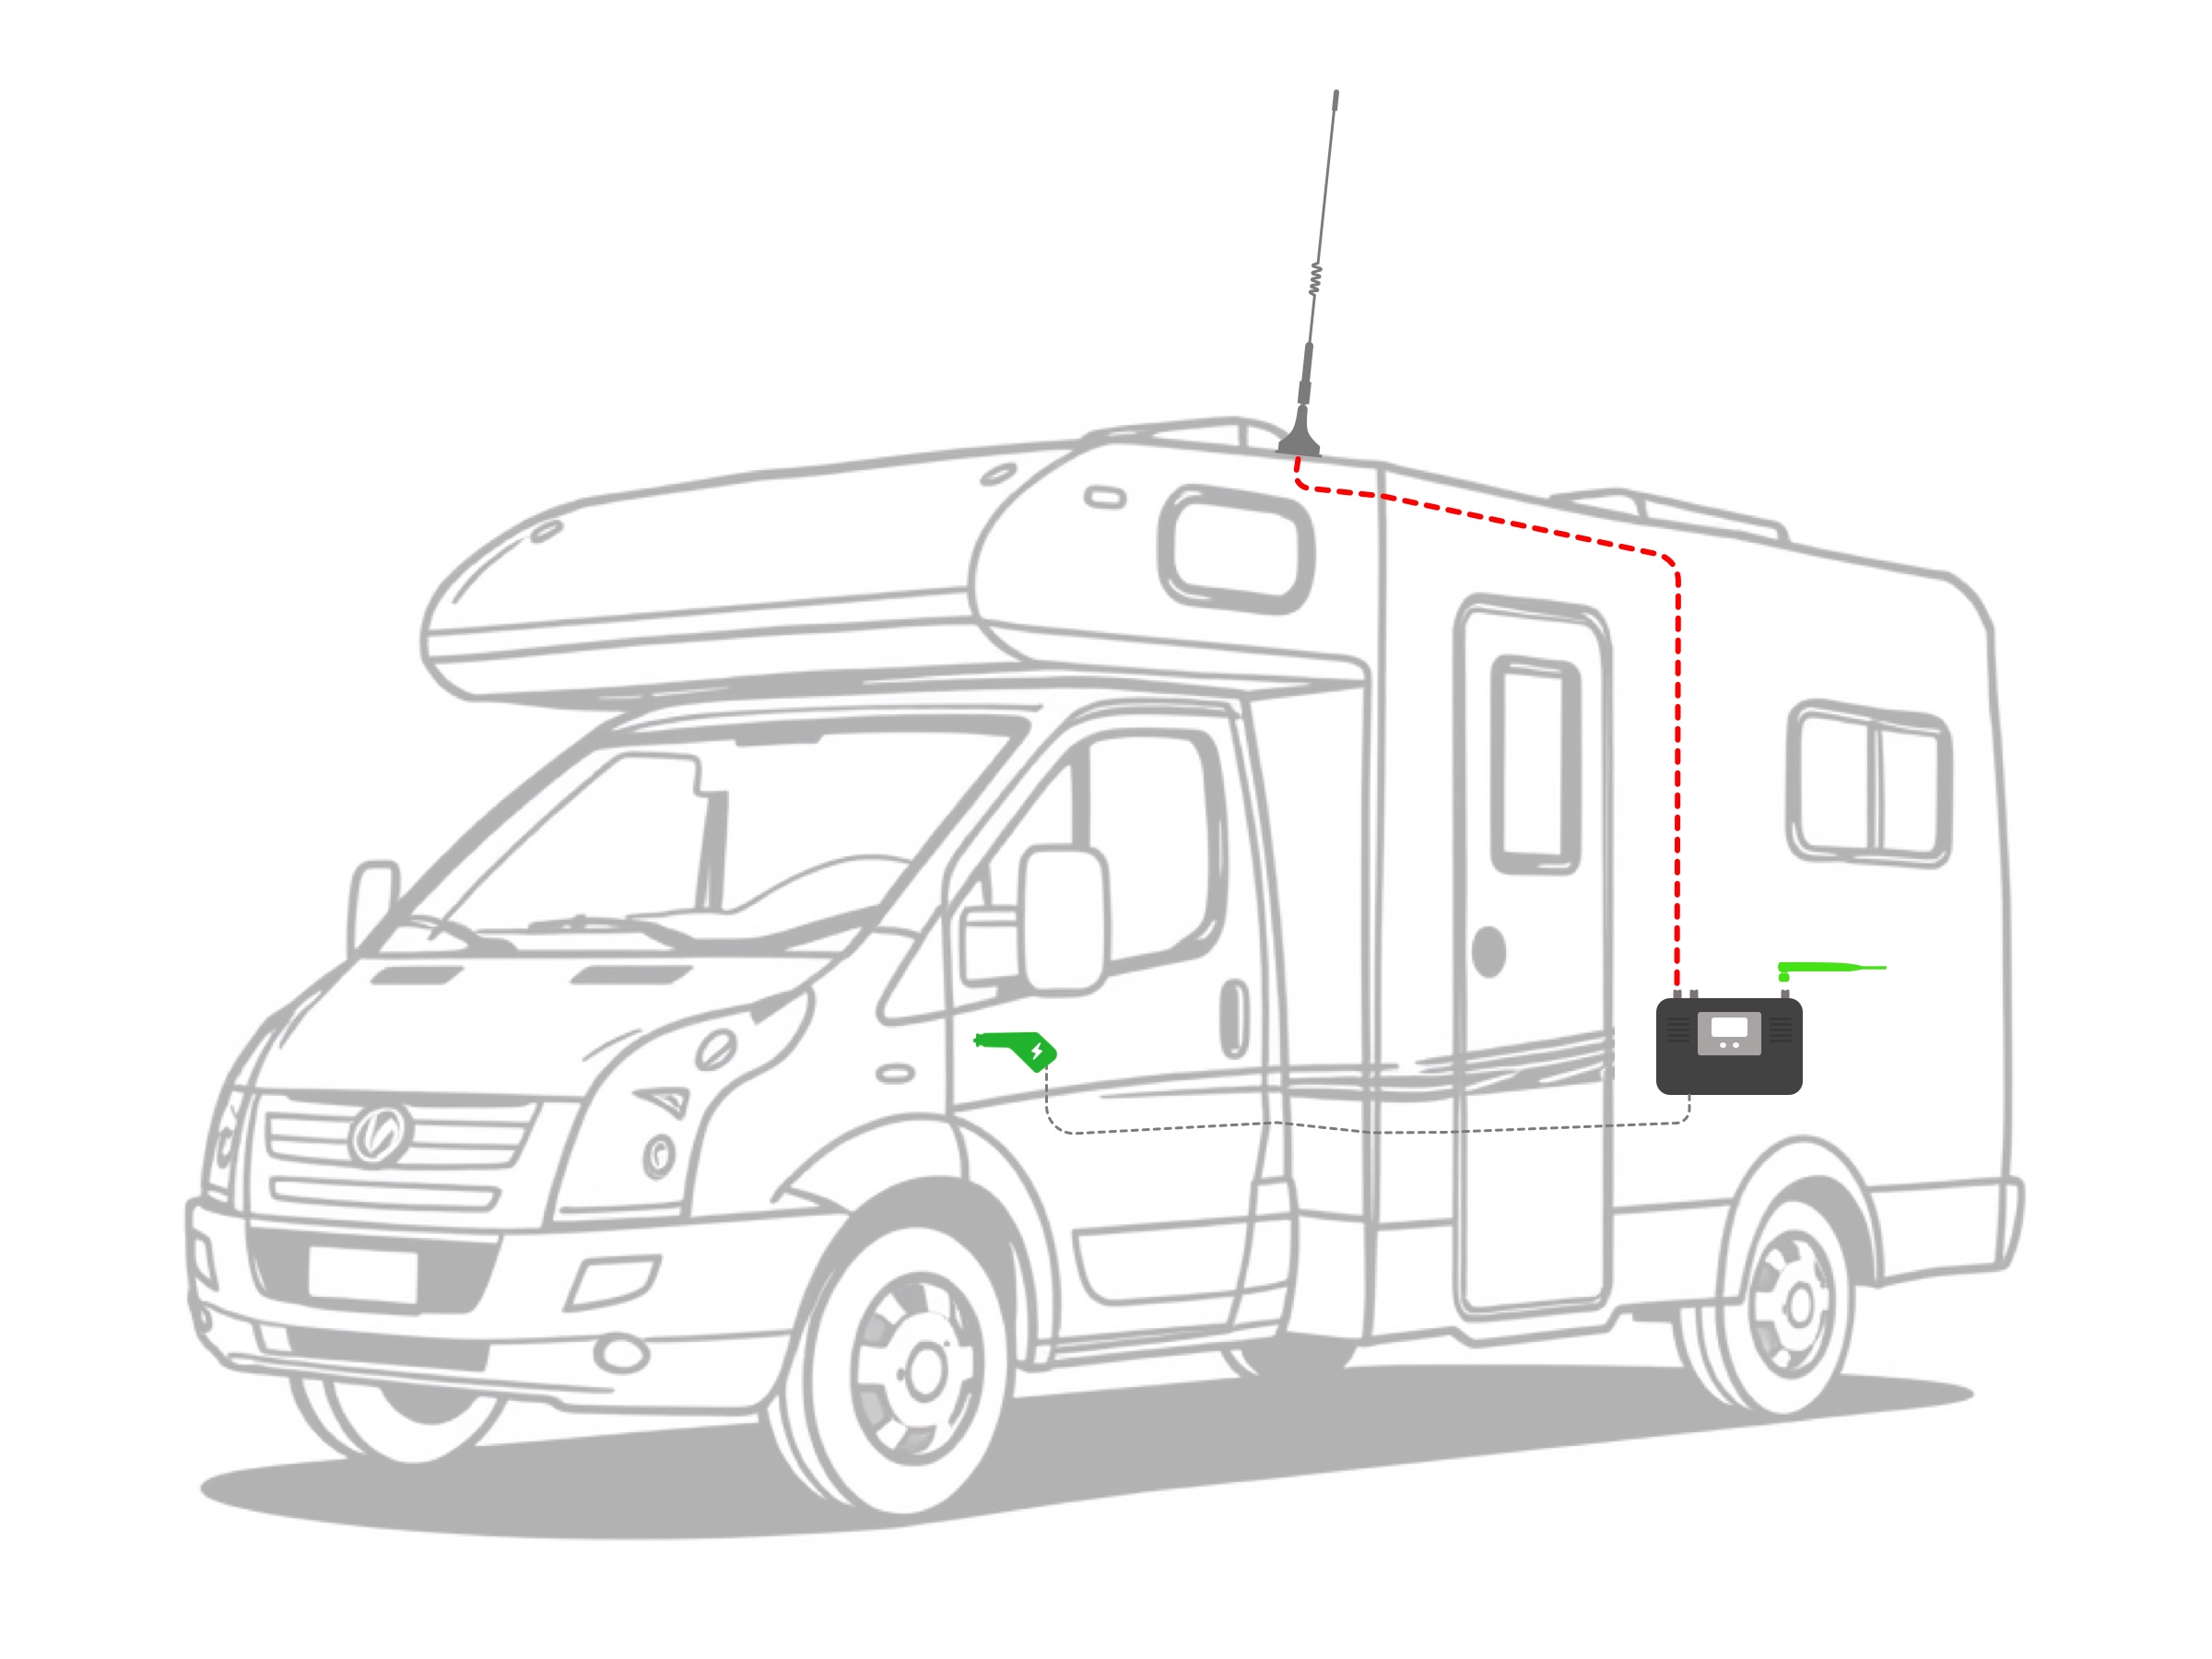
* These diagrams show a possible setup in a van or car. The placement of the external and internal antennas may vary based on your needs and your vehicle’s features. To prevent signal oscillation, ensure that the two antennas are at least 3 meters apart.
Installation on a ship/boat

*The external and internal antennas could be installed in various locations, depending on your needs and your boat’s features.
Attention! To prevent signal oscillation, it is important that the two antennas have at least 8 meters of separation.
For step-by-step assembly videos of the most popular booster models, visit our YouTube Channel.
Before turning on the booster, check for proper antenna placement to prevent auto-oscillation issue (feedback loops) and interference:
Maintain a minimum distance between antennas:
Position antennas correctly:
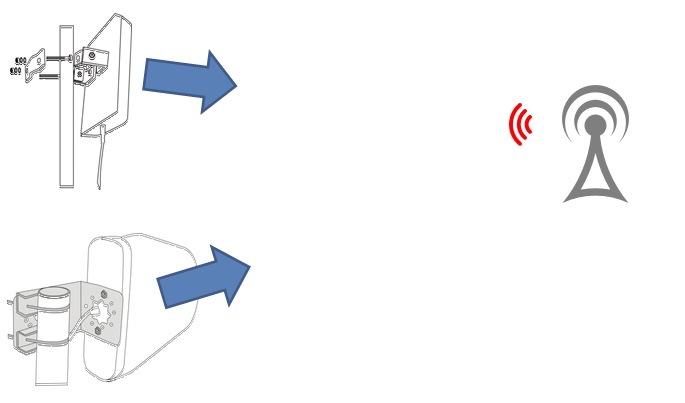

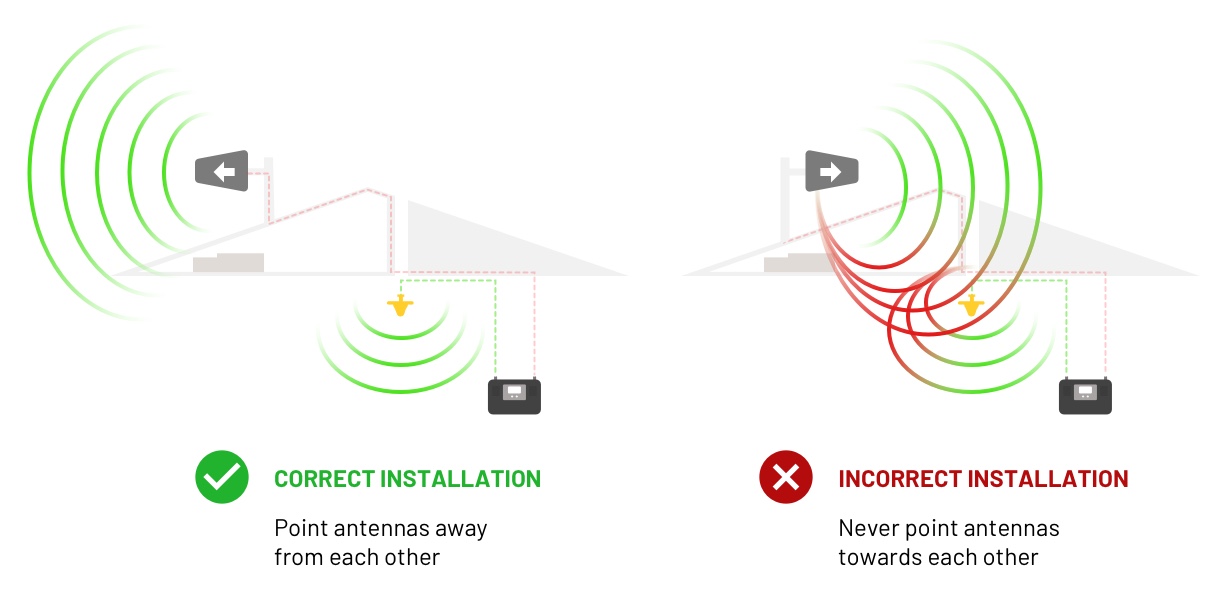
* For detailed instructions on how to aim and position the external antenna properly, refer to our Antenna Positioning Guide.
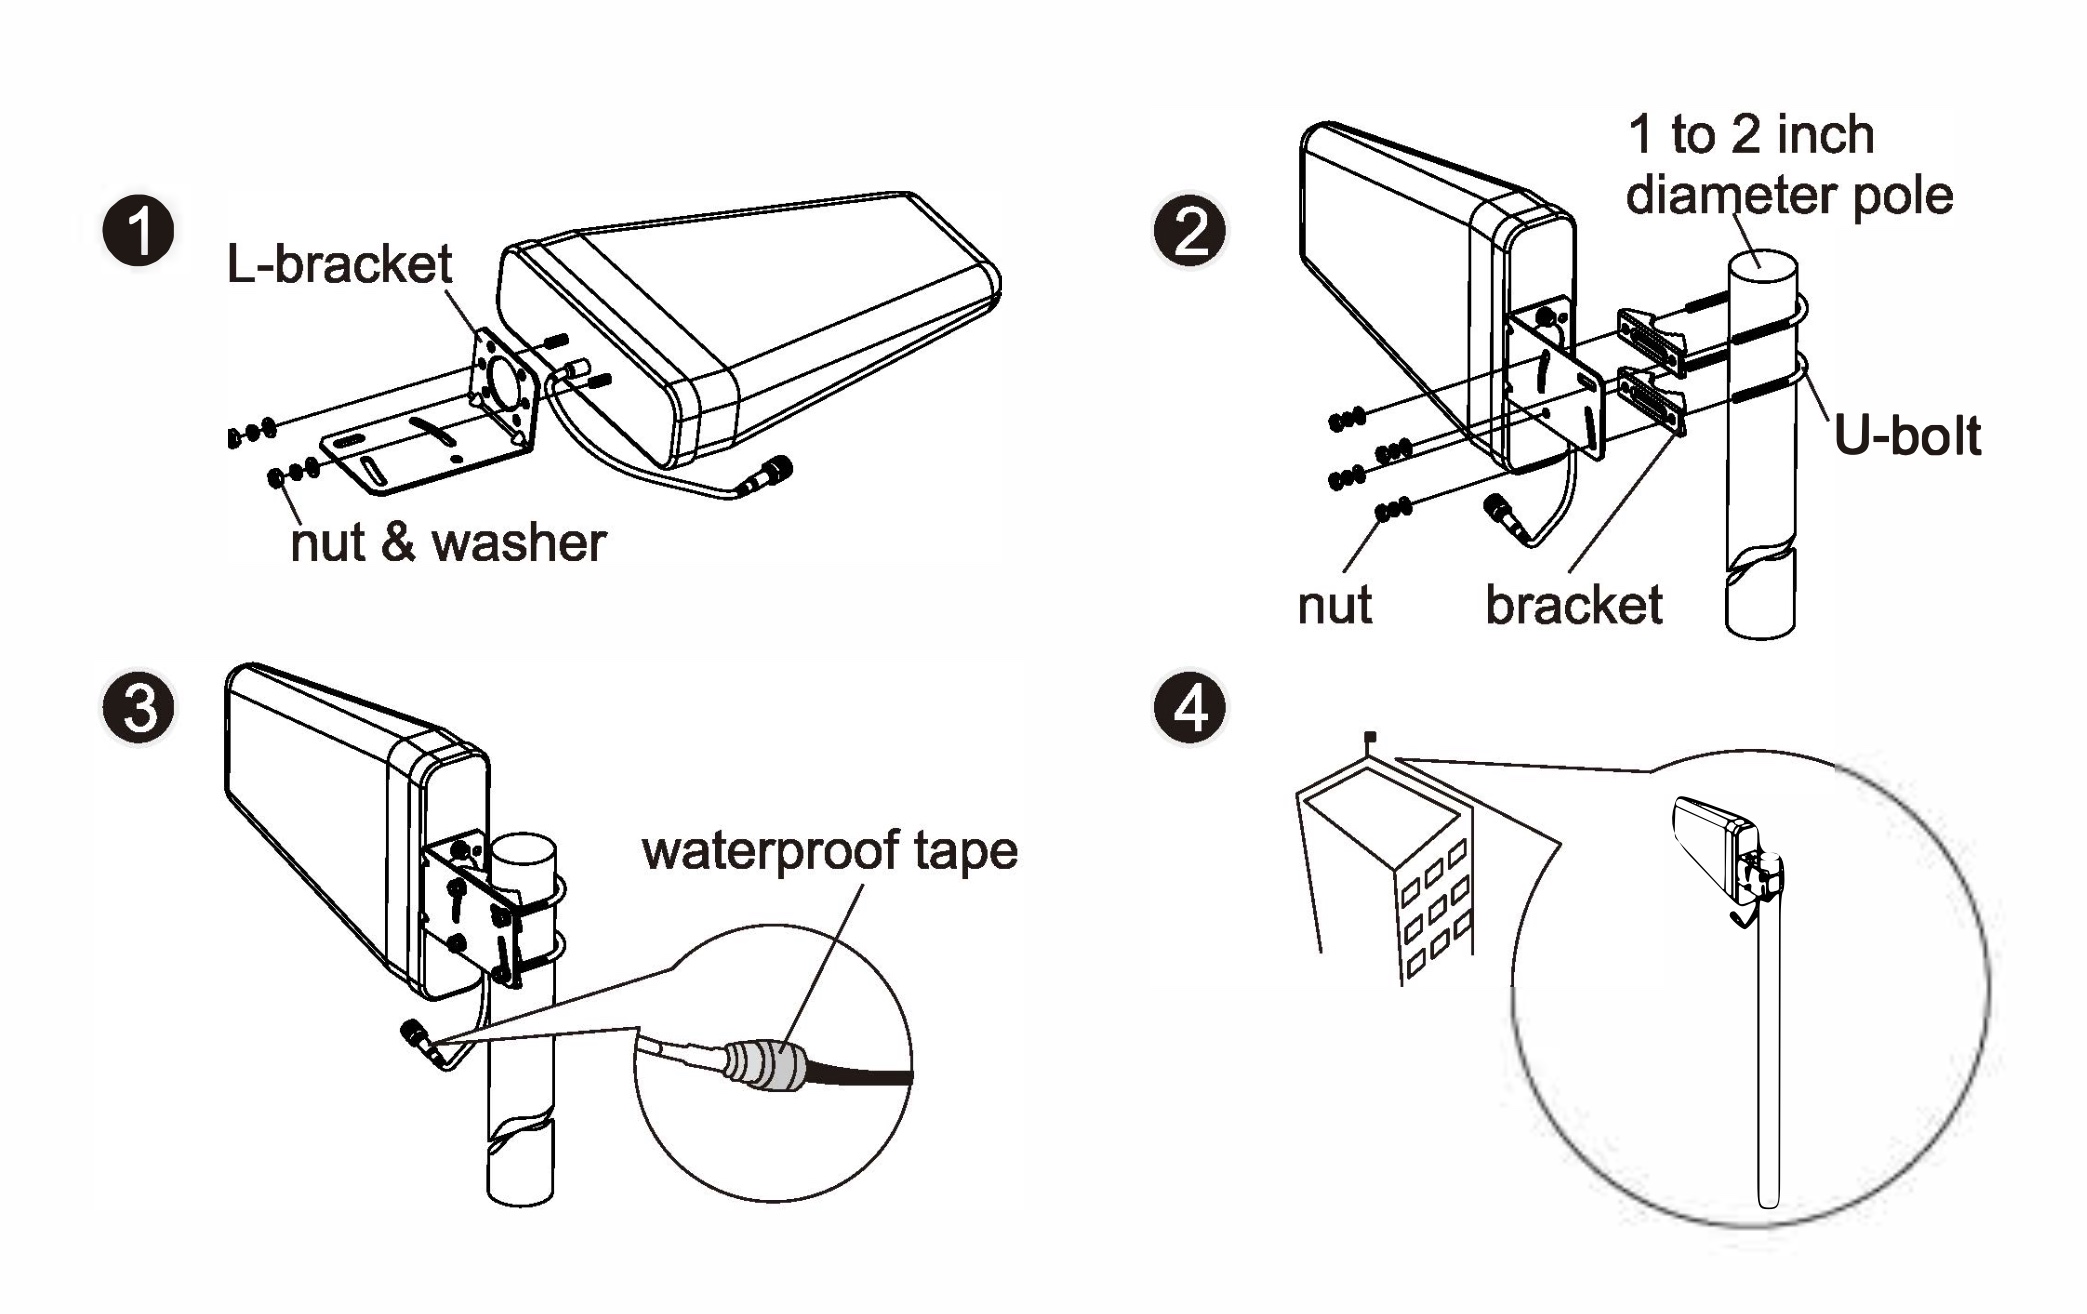
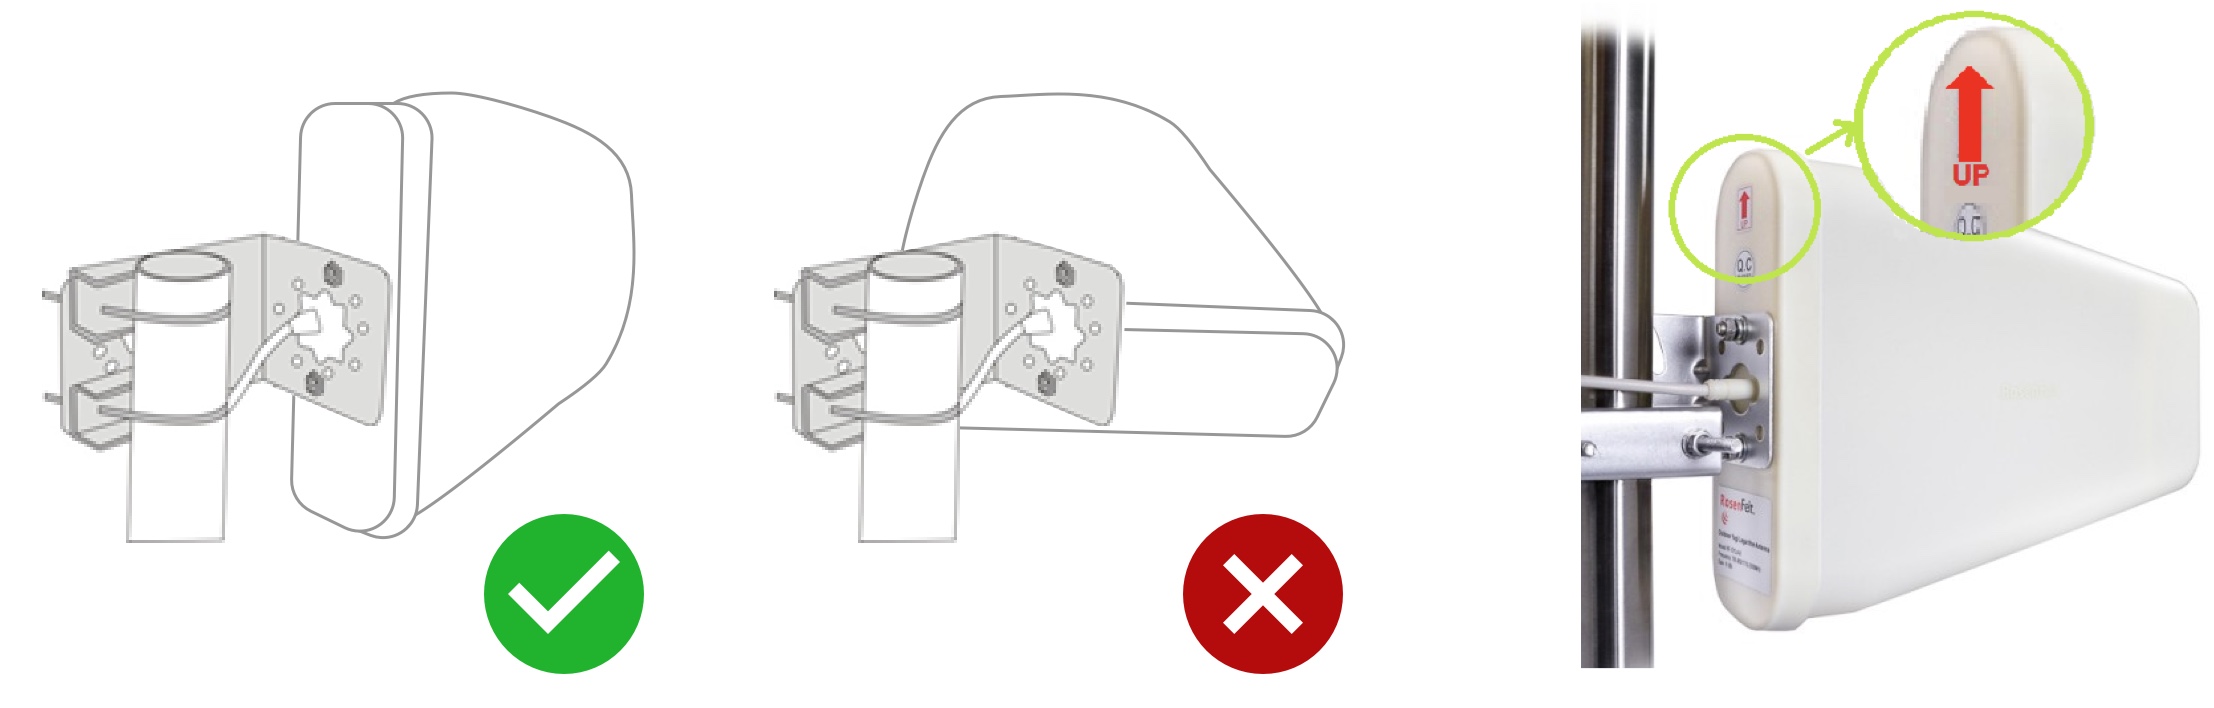
LPDA Antenna:
Should be installed on a pole.
Make sure the antenna is mounted vertically and the red arrow on the antenna case points upward.
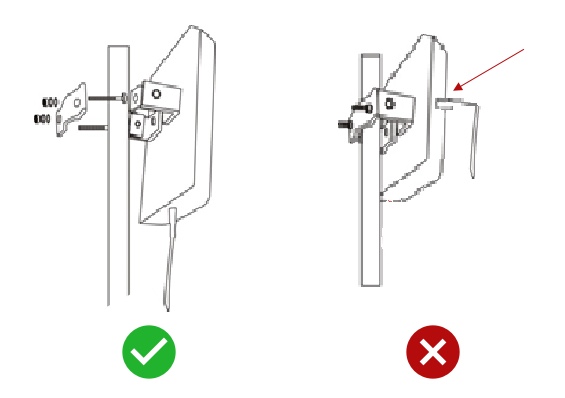
Panel Antenna:
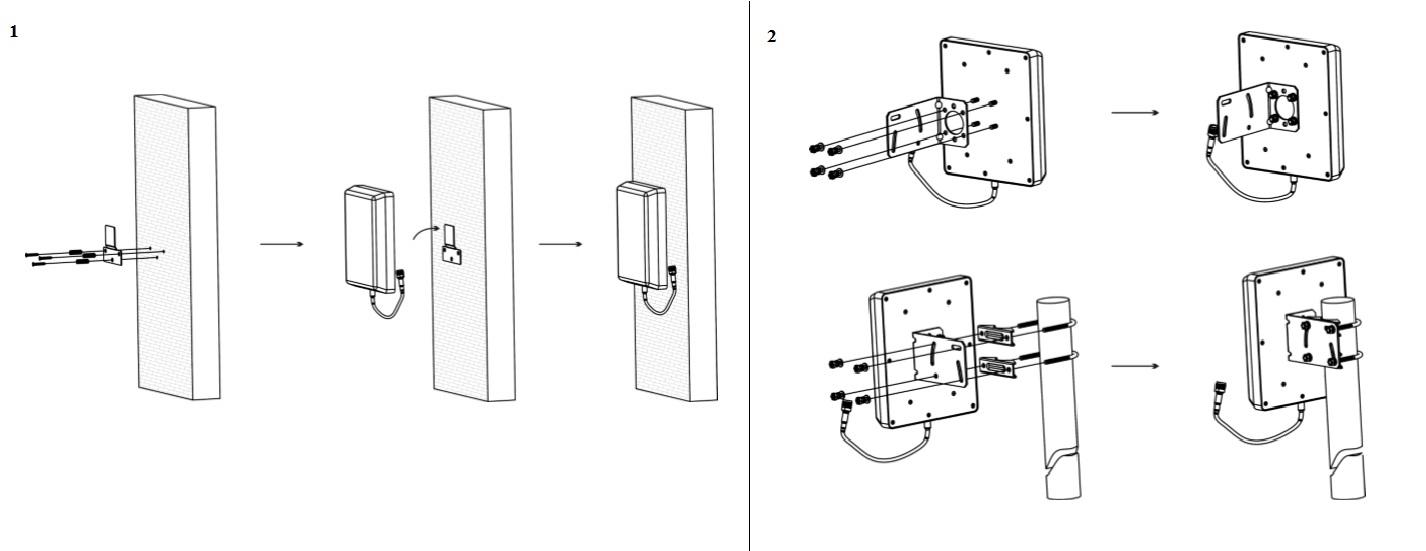
Pay attention to the vertical position of the panel antenna. The cable should go down.
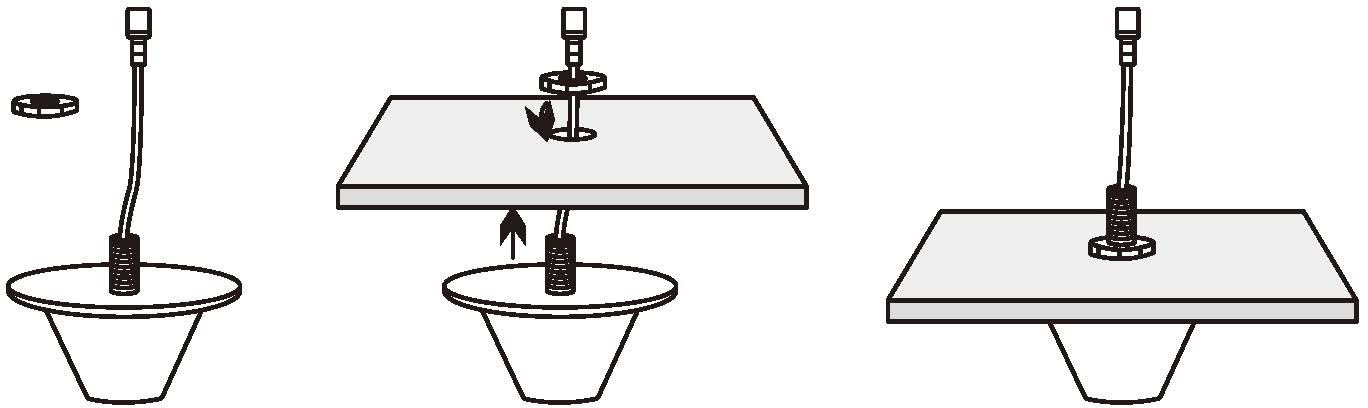
Ceiling Antenna:
Panel Antenna:
About
Boosters
Customer Care
We accept